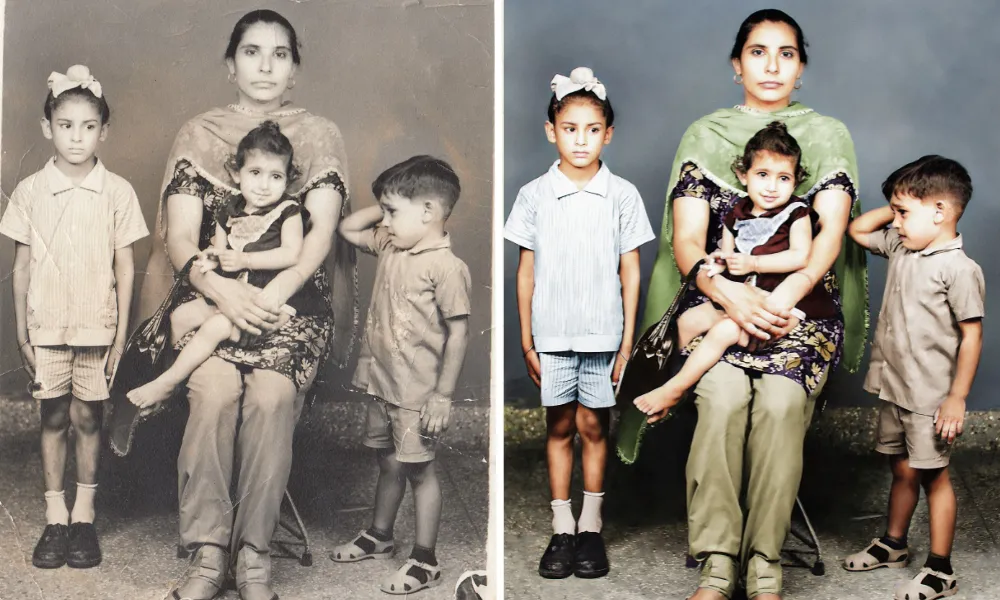
Do you have an old photo with a tear, or maybe it fell victim to one of your kid’s many spills? Don’t let photo damage take precious memories from you. Instead, you can restore old pictures in Photoshop and bring your photos back to life. Through some photo restoration techniques, you can have a new version of your favorite pictures that looks as good as new.
How Can You Restore Old Photos in Photoshop to Bring Them Back to Life?
Restoring old photos can feel daunting, but fixing photos in Photoshop makes it easy to retouch, enhance, or even colorize your old photographs.
Import Your Old Photo

Scan the old photo you want to restore using a flatbed scanner and upload it into Photoshop. Ensure your photo is your background layer and lock it so there are no changes made to it.
Create a Duplicate Layer
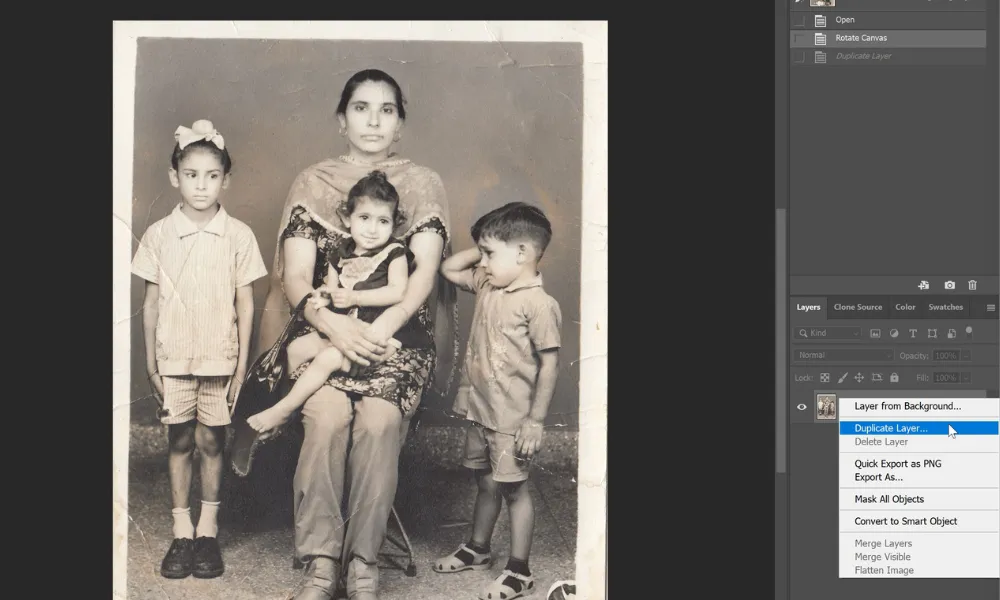
The restoration will be done in a new layer on the top of your photo. The benefit of doing restoration this way is that it technically doesn’t change the original image, allowing you to keep that scanned version as a back-up.
Crop the photo
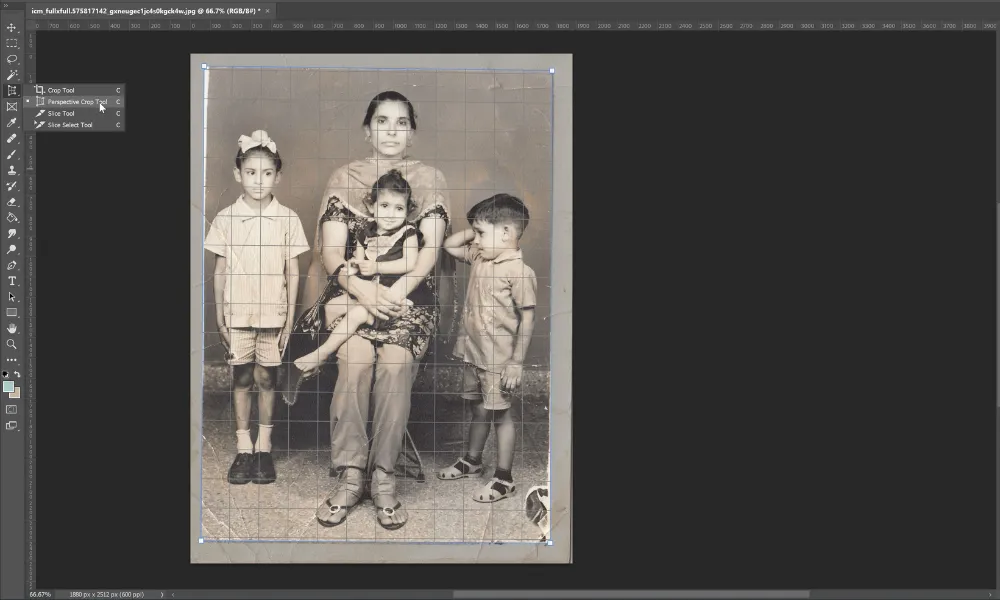
Your photo may have edges or may not be correctly aligned. You can easily address this by using the “crop tool” or “perspective crop tool”.
Use the Photo Restoration Filter
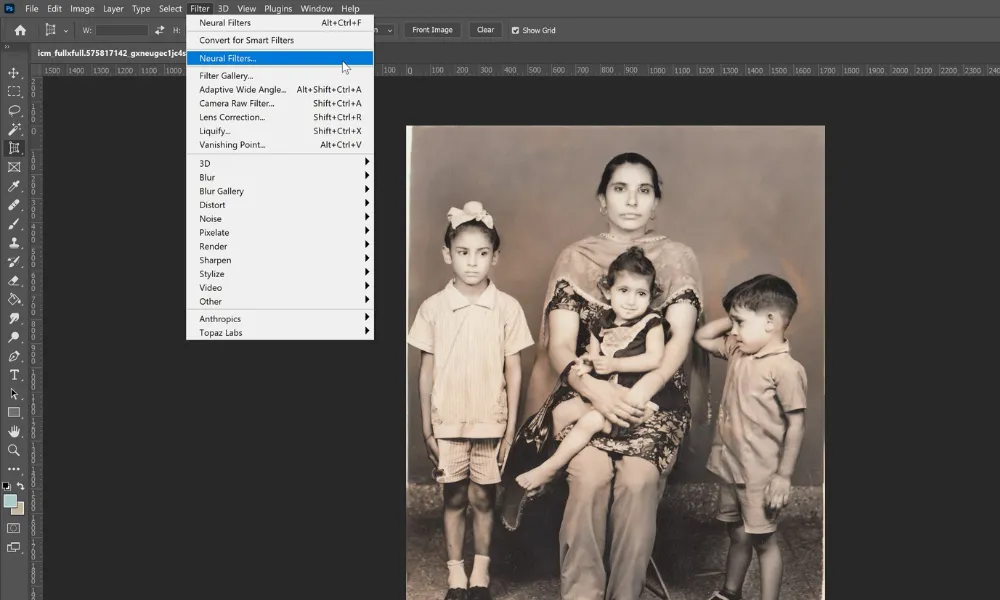
Sometimes you can save time by using the “photo restoration filter”. Under “filters,” choose “neural filers,” then pick “photo restoration.” This filter makes it easy to see improvements to your old photo with a mouse click. You can then adjust the sliders to fine-tune the edits made. These sliders can help enhance the overall picture and the faces in the photo or even reduce the appearance of a scratch on the original photo.
Make More Detailed Improvements
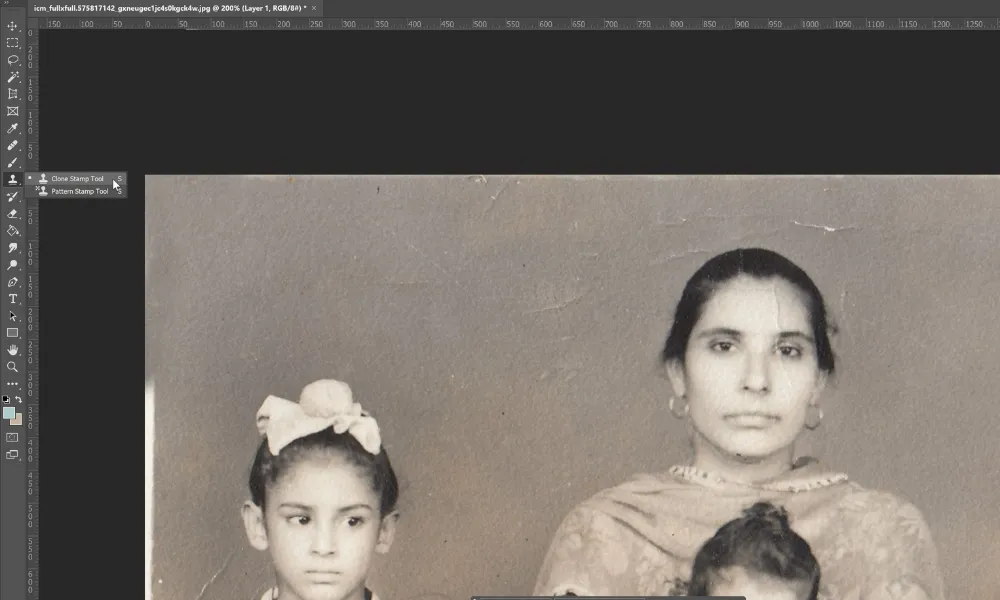
If there’s additional damage that you’d like to restore on your photo, there are tools you can use. You can use the Spot Healing Brush to fix specific damaged areas on the photo. If you’re still left with unwanted damage, use the Clone Stamp tool to cover them up. The Stamp tool will allow you to copy pixels from one area of the photo and paste them into another desired place.
However, ensure you choose the option for “current layers and below” for this to work correctly.
Remove Dust & Particles
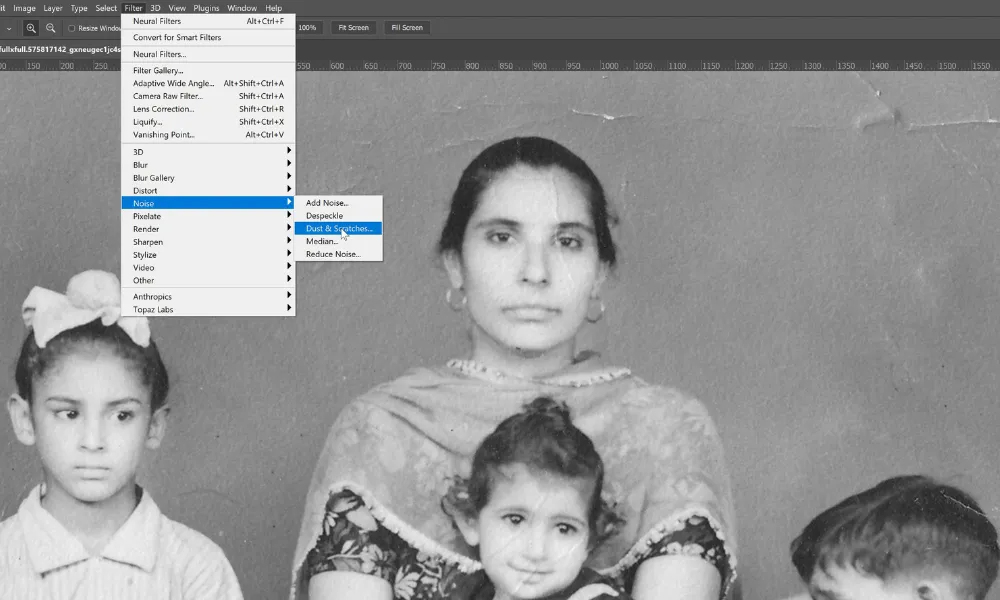
Photoshop has a fantastic built-in filter called Dust & Scratches. Once you create a duplicate layer of your last layer, head to FILTER>NOISE>DUST & SCRATCHES and you can get rid of dust and small scratch marks. Ensure that you play with the settings until you find the optimal results, as overdoing it will make your image too soft.
Increase Size & Resolution
Press CTRL+ALT+I on windows and increase the weight and height of your photo. The ideal resolution would be the longest line 5500px on 300dpi.
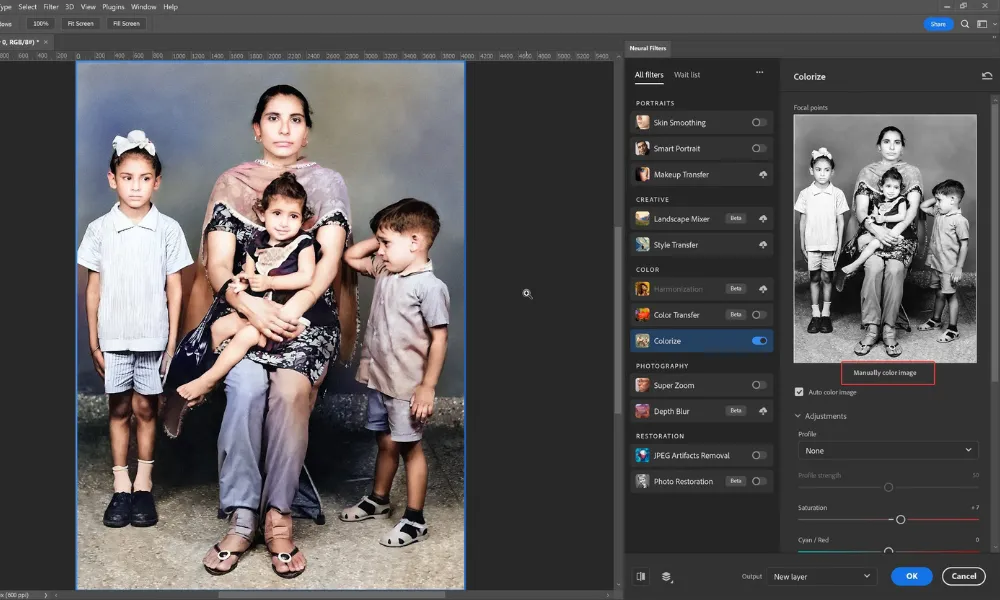
Colorize Black and White Photos
If you’re restoring a picture like your grandparents’ black and white wedding photo, you may want to colorize it. Combine your existing layers into one layer without deleting the previously combined layers. To do this, use the following shortcut:
· Windows: Ctrl+Alt+Shift+E
Once your layers are combined, choose “Colorize” under Neural Filters. Once the photo is colorized, you can make additional improvements by creating a new layer (CTRL+J on windows) and set the blending mode to color. Then start using on it the Brush tool + the desired color.
Sometimes using neutral filters colorizing option will not have good results, therefore you will have to colorize your photo manually, using the “Manual color image” function or the new layer method where you colorize everything individually using the brush tool and mask.
Export Your Restored Photo
Save the image in your chosen format once you’re happy with your photo restoration results. Most users will choose JPGs for a lower file size. They are ideal for sharing and social media. PNGs are another option due to their quality-preserving capabilities but they are heavier in size than JPGs. PNGs are ideal when it comes to printing.
Now you can repair damaged images with Photoshop to preserve memories!
How Do You Restore Faded Colors in a Photo?
We’ve covered how to restore old pictures in Photoshop with rips or little spots, but do you have an image with faded colors? The sunlight and the mix of chemicals in the air such as dust, cigarettes, and many others, can cause fading and deterioration in photographs. While fading is common in older photos, restore old blurry photos in Photoshop by following these steps.
Use Auto Color
The auto color setting in Photoshop will adjust the colors automatically. However, it doesn’t always work seamlessly. Auto Color adjusts the colors in your photos using Photoshop’s built-in algorithm, which may cause the colors to be off. Manual coloring may be required.
Adjust Colors
You can adjust the colors in the adjustment layer. The sliders in this layer allow you to change the intensity and type of color in your image. As you fix old photos in Photoshop, this will give you a more exact shade match.
Utilize the Levels Panel
The Levels panel in Photoshop allows you to adjust shadows, blacks, and midtones to fit the appearance of the original photo. It is recommended to utilize each RGB channel separately, instead of doing directly in the RGB channel.
Manually Colorize the Photo
Sometimes, the above options will not be enough to bring your photo in good shape, therefore you will have to create a new layer and do the coloring manually.
Use the Clarity and Texture Slider
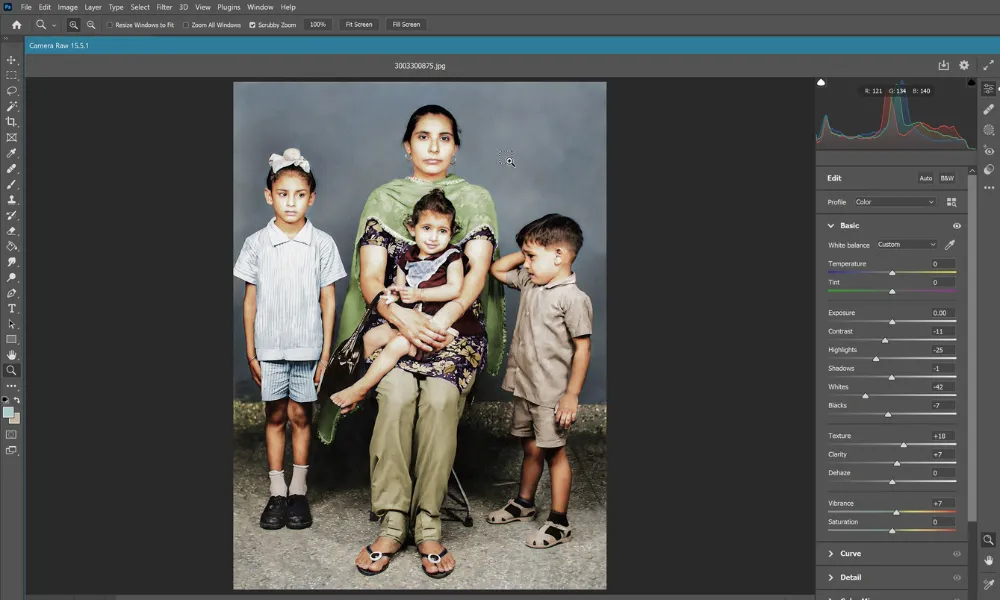
Finally, boost the sharpness and texture to perfect the look of your restored photo.
You can do this by going to FILTER>CAMERA RAW FILTERS. You will need to use the Clarity and Texture sliders to sharpen your faded photo.
How Can You Fix Water Damage on Photos?
Water damage in a photo can be devastating. While it can be more complicated to restore an image with this type of damage, there are some steps you can take to improve the appearance.
You’ll want to copy and paste sections of your photo using existing content. Create a new layer, then use layer masks to blend the new section in. Then, you can utilize the clone and patch tool options to hand-paint the image to replace the damaged content.
Restoring a water-damaged picture is more extensive than other restoration projects, but the result is worth it.
Tips to Make Photo Restoration Easier
Photo restoration can be done by anyone with the software, but experts have some tips on how to repair old photos in Photoshop easily, including:
· Use a tablet with a pencil-like stylus to get the fine details you’re looking for. This setup can be easier to handle and give more natural results than a computer and mouse.

· Use a small brush size to allow for natural, small strokes. It may take longer than using a larger brush, but the result will look much more like the original photo due to the finer details a small brush allows.
· Utilize many adjustment layers to keep your restoration project organized. Using multiple editing layers and layer masks will let you go back and adjust specific elements of your restoration without affecting the other work you’ve done.
· Refine color corrections that the Neural Filter does. This filter automatically adjusts the photo you’re restoring but can miss some finer details. Once you’ve utilized the Neural Filter, take some time to adjust areas that don’t quite fit the photo to make it look more natural.
Pixels Photo Art Can Help
Pixels Photo Art can help you restore old photographs with various damage, including torn, faded, scratched, or water-damaged photos. That’s not all they do, though! Pixels Photo Art also offers personalized paintings of your pictures and many other unique gift ideas for the photo lover in your life!
About the Author

Peter Makeshoff
Peter Makeshoff is the founder and main author of Designer Daily.