What is image editing? Why it is so important? Well most of us may know the answer because nowadays people click pictures everywhere with not only professional cameras but also with smartphone cameras. Who does not want to look beautiful? Everyone wants to look gorgeous or want the images they click to look beautiful. Pictures straight out of the camera may look okay or even more than okay with expensive cameras but they are not perfect at all.
To make images perfect image editing or post-processing is necessary. Graphic designers or photoshop experts have professional knowledge of image editing software like Adobe photoshop cc, lightroom, illustration, etc. Most of the photographers also learn photoshop to edit their image on their own but this slows down the productivity of the photographer. So, today’s article is not only for the editors and designers but also for the photographers who can speed up their editing process with this basic editing.
Image Editing Tips For Graphic Designers And Photographers
The 5 image editing tips I am going to talk about today is for speeding up the editing process so that you can focus on the more important and critical things. Of course, if you are a graphic designer or a photoshop expert, the most important thing for you is editing but if you are a photographer then clicking pictures is more important than editing.
The photo editing tips I am going to share is a combination of a few basic editing and easing the workflow for you. So, let’s get started without any delay…
Straighten and Crop
After you insert your image into an image editing software the first thing you should do is to ensure your image is straight enough. Framing is an important aspect of making images look from good to great. To hit the right spot with image framing you should have to have the knowledge about photography and framing. I can give you what I know but let’s keep that for another day.
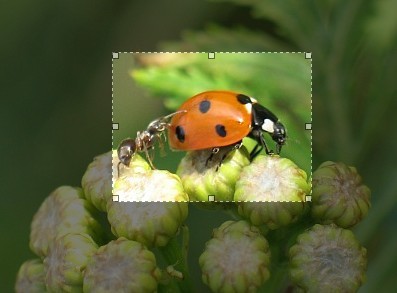
So the first thing is to straighten your image and this can be done by cropping your image. Use the cropping tool of your image editing software and use a grid view while you crop. Why grid view is important? Well, the whole photography or cinematography is standing upon one rule. That is the “Rule of Thirds”. To be able to put your image one the rule of thirds you have to use the grid view. So, use grid view and crop tool, then crop your image, straighten it, put it in the rule of thirds.
Remove Dust Particles
The next must-do thing in your image editing is fixing the image. The process that we use to remove dust, spots, blemishes, and wrinkles from a photo is the photo retouching service. In this image editing technique, we use the Healing Brush Tool, Patch Tool, Red Eye, Clone Tool, Eraser Tool, Blur Tool, Dodge, and Burn Tools to fix the imperfection of the image.
During the photoshoot, a photographer tries as hard as possible to get the perfect click but the raw image from the camera may contain dust particles, or maybe something came into the background. These are unavoidable and uncontrollable circumstances. So what should we do if we face something like this? The answer is image post-processing in photoshop.
If you get minor spots, scratches, or blemishes image retouching technique can save you. On the other hand, if you unwanted subject appearing in your frame then the background removal process will help you. In background removal service all you need to do is use the clipping path technique to select the object you want to remove and then hit the delete button.
Adjust the Highlights and Shadows
Highlights and shadows are an important aspect of an image and if you messed up here, your image will look awful. Generally, the photographer tries hard to keep the highlights and shadows close to perfect during the shoot. So, try to achieve the maximum balance of highlights and shadow in the raw image and then make it perfect in post-processing.
Keeping your image close to natural looking is the best thing to do but if you want to manipulate your image and make with your imagination then you should only care for the lighting and shadow. Because in the image manipulation technique you can manipulate almost everything around the subject without the lighting and shadow. Yes, you can edit them also but won’t get the jaw-dropping result if you overdo it.
Use Presets
The editing tips I have given above are the basic thing you should do when you go to post-process your image. Now let’s talk about overall editing and applying different filters. After you complete those basic editing tries to use presets or actions to edit your image. What is preset? Or what are photoshop actions?
Well, these are a combination of image editing that is saved and you can use them on a similar kind of image to get similar output but faster than before. How to use presets? It’s easy to just insert your image and do some basic touch up and then got to the preset menu and selects the saved preset in your computer and hit apply. Your image will get a similar filter that the preset holds. By using presets and actions you can achieve faster workflow like never before.
Use Batch-Editing
Sometimes you have lots of images that need similar kinds of editing. Editing then one by one is a time-wasting job for sure. In Lightroom, you can do batch editing. Basically, it is a process by which editors use a preset and select all the images and make a batch of them that they want to edit. Then they apply the preset to that batch and all of the images in that batch get the same editing in a matter of time. It is a huge time saver especially when you are short of it the most.
About the Author

Peter Makeshoff
Peter Makeshoff is the founder and main author of Designer Daily.