Diamond painting is a relatively new art form that has been gaining popularity among crafters and artists alike. It involves using tiny resin “diamonds” to create a sparkling, mosaic-like image on a canvas. The process is similar to paint-by-numbers, but instead of using paint, the artist uses a special applicator tool to place the diamonds onto the canvas.
For beginners, diamond painting can be a fun and relaxing way to create beautiful art without needing any prior experience or artistic talent. The process is simple and straightforward, and the end result is a stunning piece of artwork that can be displayed or given as a gift. In this beginner’s guide to diamond painting, we will cover everything you need to know to get started with this exciting new craft. From selecting the right supplies to mastering the basic techniques, you’ll be well on your way to creating your own dazzling diamond paintings in no time.
Understanding Diamond Painting
Diamond painting is a fun and relaxing craft that involves using tiny resin diamonds to create a beautiful and sparkling artwork. It is a relatively new craft that has gained popularity in recent years, and it is perfect for both experienced crafters and beginners.
History and Evolution
Diamond painting is a modern twist on the classic paint-by-numbers and cross-stitch crafts. It originated in Asia and has since spread to other parts of the world. The craft has evolved over time, and there are now many different types of diamond painting kits available on the market.
The Basics of Diamond Painting
Diamond painting is a simple and easy craft that involves placing tiny resin diamonds onto a pre-printed canvas. The canvas is divided into numbered sections, and each section corresponds to a specific color of diamond. The diamonds are then placed onto the canvas using a special pen tool and adhesive wax.
One of the great things about diamond painting is that it doesn’t require any special skills or artistic talent. Anyone can do it, and the end result is always a stunning piece of artwork.
Types of Diamond Painting Kits
There are many different types of diamond painting kits available on the market. Some kits come with a full set of tools, while others require you to purchase the tools separately. Some kits also come with pre-printed canvases, while others require you to create your own design.
Some popular types of diamond painting kits include:
- Full drill kits: These kits have a full canvas covered in diamonds, providing a complete and detailed image.
- Partial drill kits: These kits have a partial canvas covered in diamonds, leaving some parts of the image blank.
- Custom kits: These kits allow you to create your own design and choose your own colors.
Getting Started with Your First Project
If you’re new to diamond painting, getting started with your first project can be a bit overwhelming. But don’t worry, with the right tools and a little bit of patience, you’ll be creating beautiful diamond paintings in no time. Here are some tips to help you get started.
Choosing the Right Kit
The first step in getting started with diamond painting is choosing the right kit. There are many different kits and accessories available, so it’s important to choose one that suits your skill level and interests. Some kits come with pre-printed canvases, while others require you to apply the adhesive canvas yourself. Make sure to read the instructions carefully before purchasing a kit.
Understanding the Canvas
The canvas is the base of your diamond painting, and it’s important to understand how it works. Most canvases are made of a flat surface with a sticky adhesive layer on top. The adhesive layer is covered with a protective sheet that you’ll need to remove before starting your project. Some canvases are pre-printed with a design, while others are blank. Make sure to choose a canvas that matches your skill level.
Setting Up Your Workspace
Before you start your project, it’s important to set up your workspace properly. Find a flat surface to work on, and make sure it’s clean and free of any dust or debris. You’ll also need a good light source to help you see the small diamonds. Consider investing in a light pad to make the process easier. Finally, make sure you have all the necessary tools and accessories, such as a diamond applicator and tray.
With these tips in mind, you’re ready to start your first diamond painting project. Remember to take your time and enjoy the process. Diamond painting can be a relaxing and rewarding hobby, and with practice, you’ll be creating beautiful works of art in no time.
Essential Tools and Materials
When starting with diamond painting, it is essential to have the right tools and materials to ensure a successful and enjoyable experience. Here are some of the essential tools and materials you will need:
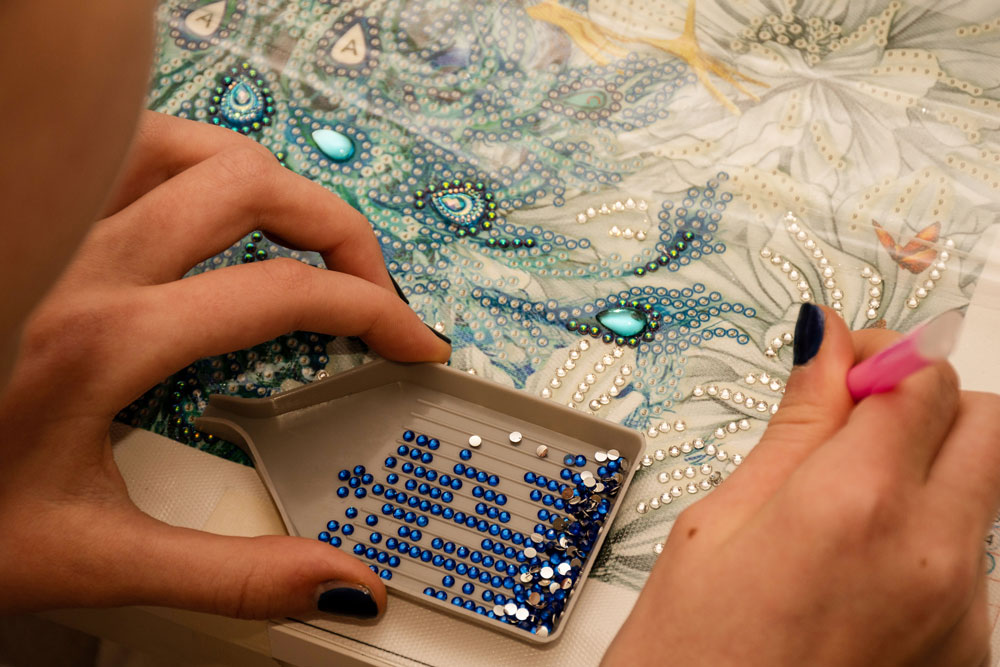
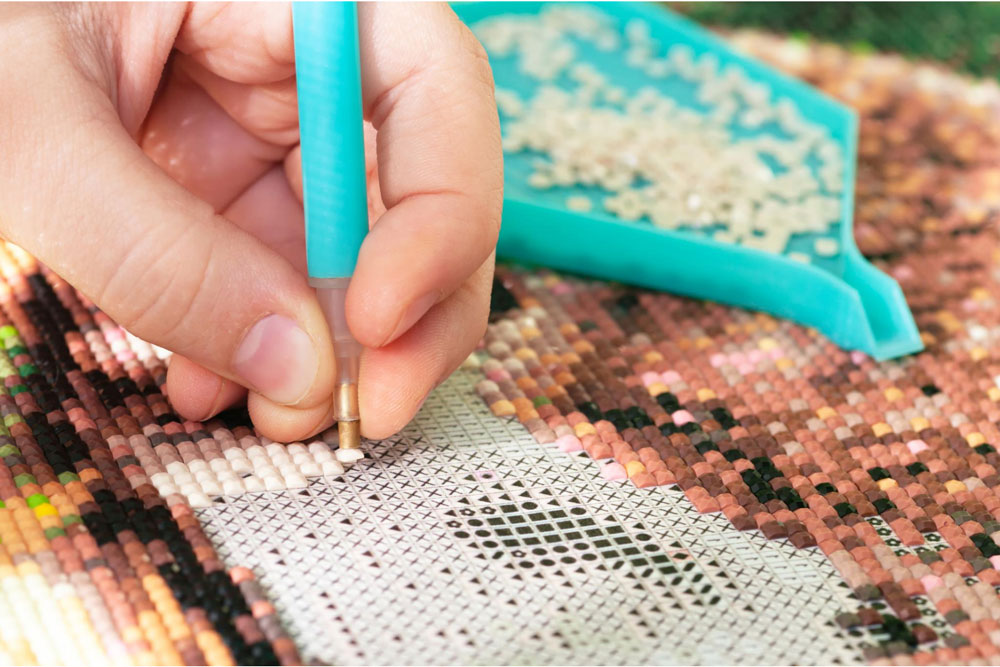
The Diamond Applicator Tool
The diamond applicator tool is one of the most important tools for diamond painting. It is a pen-like tool that allows you to pick up and place the diamonds onto the canvas. The tip of the tool is usually made of plastic or metal and has a small indent that holds the diamond in place. It is important to choose a tool that is comfortable to hold and easy to use.
Tweezers and Wax
Tweezers and wax are also important tools for diamond painting. Tweezers are used to pick up the diamonds that are too small to be picked up by the diamond applicator tool. Wax is used to make the diamonds stick to the tip of the diamond applicator tool. It is important to choose tweezers that are precise and easy to handle. The wax should be soft and sticky enough to hold the diamonds but not too sticky that it becomes difficult to work with.
Trays and Drills
Trays and drills are also important materials for diamond painting. The trays are used to hold the diamonds while you work on the canvas. The drills are the small, shiny beads that are used to create the diamond painting. It is important to choose a tray that is large enough to hold all the diamonds you need for your project. The drills should be high-quality to ensure a beautiful finished product.
Step-by-Step Diamond Painting Process
Diamond painting is a fun and relaxing activity that involves applying small resin diamonds to a canvas to create a beautiful, sparkling picture. Here is a step-by-step guide to help beginners get started with diamond painting.
Preparing the Canvas
The first step in diamond painting is to prepare the canvas. The canvas will have a protective film covering it that needs to be removed before starting. Once the protective film is removed, the canvas is ready to be worked on.
Next, the adhesive needs to be applied to the canvas. It is important to work on one section at a time to prevent the adhesive from drying out. The adhesive is usually applied using a diamond painting pen tool that has a small applicator tip.
Applying Diamonds to the Canvas
Once the adhesive is applied, it’s time to start applying the diamonds to the canvas. The diamonds come in different colors and are usually sorted into small bags or containers. It’s important to keep the diamonds organized to prevent mixing up colors.
To apply the diamonds, use the diamond painting pen tool to pick up a diamond and place it on the corresponding symbol on the canvas. It’s important to apply the diamonds with care to ensure they are aligned correctly.
Finishing Touches and Framing
Once all the diamonds are applied, it’s time for the finishing touches. Use a rolling pin or flat tool to gently press the diamonds into the adhesive to ensure they are securely attached.
Finally, the canvas can be framed to give it a polished and professional look. There are many framing options available, including traditional frames and floating frames.
Tips and Techniques for Better Results
Working with Different Drill Shapes
When it comes to diamond painting, there are two main types of drills: round and square. Round drills are easier to work with and give a softer, more blended look to the finished product. Square drills, on the other hand, are more challenging to work with but give a crisp, sharp look to the finished product. If you’re a beginner, it’s recommended to start with round drills and then progress to square drills once you’ve gained some experience.
Maximizing Sparkle and Shimmer
One of the main appeals of diamond painting is the sparkle and shimmer that comes from the finished product. To maximize this effect, it’s important to ensure that the drills are placed tightly together with no gaps. Additionally, working in a well-lit area can help to bring out the shine of the drills.
Troubleshooting Common Issues
While diamond painting is a relatively simple craft, there are some common issues that can arise. One issue is creases in the canvas, which can be caused by improper storage or handling. To avoid this, it’s important to store the canvas flat and avoid folding it. If you do end up with creases, gently ironing the back of the canvas can help to smooth them out. Another issue is drills that won’t stick to the canvas. This can be caused by a variety of factors, such as the canvas being too cold or too dry. To remedy this, try warming up the canvas with a hair dryer or lightly misting it with water before placing the drills.
By following these tips and techniques, beginners can achieve beautiful and sparkly diamond paintings. Remember to take your time and enjoy the process, and don’t be afraid to experiment with different techniques and styles.
Caring for and Displaying Finished Artwork
Once you have completed your diamond painting, you may be wondering how to care for and display your finished artwork. Here are some tips to help you preserve and showcase your masterpiece.
Framing and Mounting Options
One of the most popular ways to display diamond paintings is by framing them. You can choose a frame that complements the colors and style of your artwork. There are many framing options available, including wood, metal, and plastic frames. You can also choose to mount your diamond painting on a canvas or foam board for a more polished look.
Cleaning and Maintenance
To keep your diamond painting looking its best, you should dust it regularly with a soft, dry cloth. If your artwork becomes stained or dirty, you can gently clean it with a damp cloth. Avoid using harsh chemicals or abrasive cleaners, as they can damage the diamonds and adhesive.
Decorative Uses and Gift Ideas
Diamond paintings can be used for more than just wall art. You can also turn your finished artwork into decorative items such as pillows or coasters. These items make great gifts for friends and family who appreciate handmade crafts.
Conclusion to this Diamond Painting Guide
Diamond painting is a fun and relaxing activity that anyone can enjoy. With the right tools and materials, beginners can easily create stunning works of art that they can be proud of.
By following the basic steps outlined in this guide, beginners can learn the techniques and skills necessary to complete their first diamond painting project. It is important to take the time to properly prepare the canvas, organize the diamonds, and apply them carefully to the canvas.
Additionally, it is important to choose a design that is suitable for your skill level and personal preferences. There are many different designs available, ranging from simple and straightforward to more complex and detailed.
About the Author

Peter Makeshoff
Peter Makeshoff is the founder and main author of Designer Daily.